CHILDS SKULL GARDEN CHAIR

Glue ups galore
At the start of this project I knew that there would be a need for multiple glue ups, there was the chance to practice squaring up long, slender sides and use my biscuit joiner again. The back of the chair would be shaped like a skull as seen in the above picture and so the joints needed to be supported knowing that the cuts would have to miss the main weak points. I made sure to place pieces across the boards to stop them curling up whilst they were being clamped, and knew they would then cure completely flat. It was a bit of a clean up job with all the glue squeezing out, but at least I knew it would be secure and take the playtime.

Making the chair frame
The frame was actually a lot easier than first imagined and although there was a lot of work involved, to get to a sturdy base for the rest of the pieces to attach, it was still a good build. The sections were all cut and sized to fit a young child, but with just a little extra to allow for use whilst they grew. The joints were all completed with screws countersunk under the surface and glued on all areas to ensure a very sturdy build. Every cross section was squared off and each side was made in tandem to ensure it was symmetrical which helps with the look and allows for more material to be used to strengthen without it looking to bulky.

Creating and fitting the slats
The slats for the seat were created from a single piece re-sawed on the table saw and then squared to ensure a flat finish and to keep the underside perfectly equal to the framing that would be underneath. The slats were all measured to just so hang over the edge of the framing and give a hidden edge to help soften the look of the over mass of wood being used. The front of the frame on each side was sectioned to allow for the slats to curve over the edge and give a comfortable flow for getting on and sliding off. these were all routed on both top edges before fitting to give comfort, avoid injury and are aesthetically pleasing.

The back support and arms
The back supports were made with the idea that although this was only for a child, its probably going to be used well, moved around a good amount and all manner of items hung on it and climbed on from many angles. To this end, I decided that the best plan was to build the back supports so as to be then supported by the arms of the chair, they in turn would be supported by the frame below them, creating a network of connections all helping each other find strength from the other. There was then more supports across the back for the back rest to eventually affix to, further strengthening the whole design.

Shaping the skull backrest
The Skull shaped back rest was finally glued up, cured and cleaned up, the design was further pencilled onto the surface so it could be seen clearer and given a heavy edge. This was then drilled through including around the eyes and nose area, to add a perforation line around the perimeter and allow for quicker cutting using a jigsaw. It also meant the tool wasn’t having to work as hard and I could remove the waste material without having to cut the whole item. I then took it to my 12” disc sander and removed the majority of the outer waste from the edge up to the line drawn previously, the rest where I couldn’t use that was removed by hand with a rasp.

Sizing up and Attaching
Attaching the backrest to the supports was simple case of lifting the item to the required height to ensure it met with the placement of the cross supports between the uprights as previously measured. It all lined up and simply screwed and glued into place. The carving for the bow fitting, was done with hand tools whilst still on the workbench and then refined a little once screwed to the supports. But before any of the final assembly could take place I clamped the Skull to the bench and routed the external and internal cuts with a 1/4” profiling bit and then repeated with a 1/4” round-over bit to soften and clean up the edges.

carving the bow
The bow was carved using a single block with a combination of Bandsaw, hand carving tools and wood rasps, there was the usual need for sanding but I did want to leave it a little chunky and rustic looking. The idea at first was that I could possibly make the bow removable and make other items available to slot into the top of the skull via dowels. But there was the thought that items may get mislaid, lost or broken whilst not on the chair. So I decided on the single bow and began with rough shaping using the bandsaw, I then furthered the shaping using the hand carving tools ensuring the fold details were in place, the slight bit of sanding I did just finished it.

Final Filling and sanding
The final stages of the actual build was to get the last pieces sanded, find all the areas for filling that were important and then sand it further again down to a smoother finish, this would ensure no splinters or cuts whilst in use. The only real places to add filler were the areas were I had sunken screws below the surface anywhere there would be hands or other body parts regularly moving or touching over the parts mostly used. So screw heads and edges were checked and filled with wood filler and then sanded down to completely flush with the surrounding surface, using first 80grit, then 120grit, then finally 240grit, with a wipe down.

Burning the project up
Burning the chair was always the plan, to what level was the question, so at first I took some of the off-cuts and scrap created during the build and tested. To get the correct version of colour, blend and depth I took each scrap and made samples, to which I burnt two different areas. One end was burnt lightly and with a more open texture, the other end was burnt harder and the texture closer together as a result. After taking the grain and dryness of the type of wood into account, the best choice seemed to be a light burn, but with a tighter texture. The look was great and I knew there would a lightening affect with the next steps.

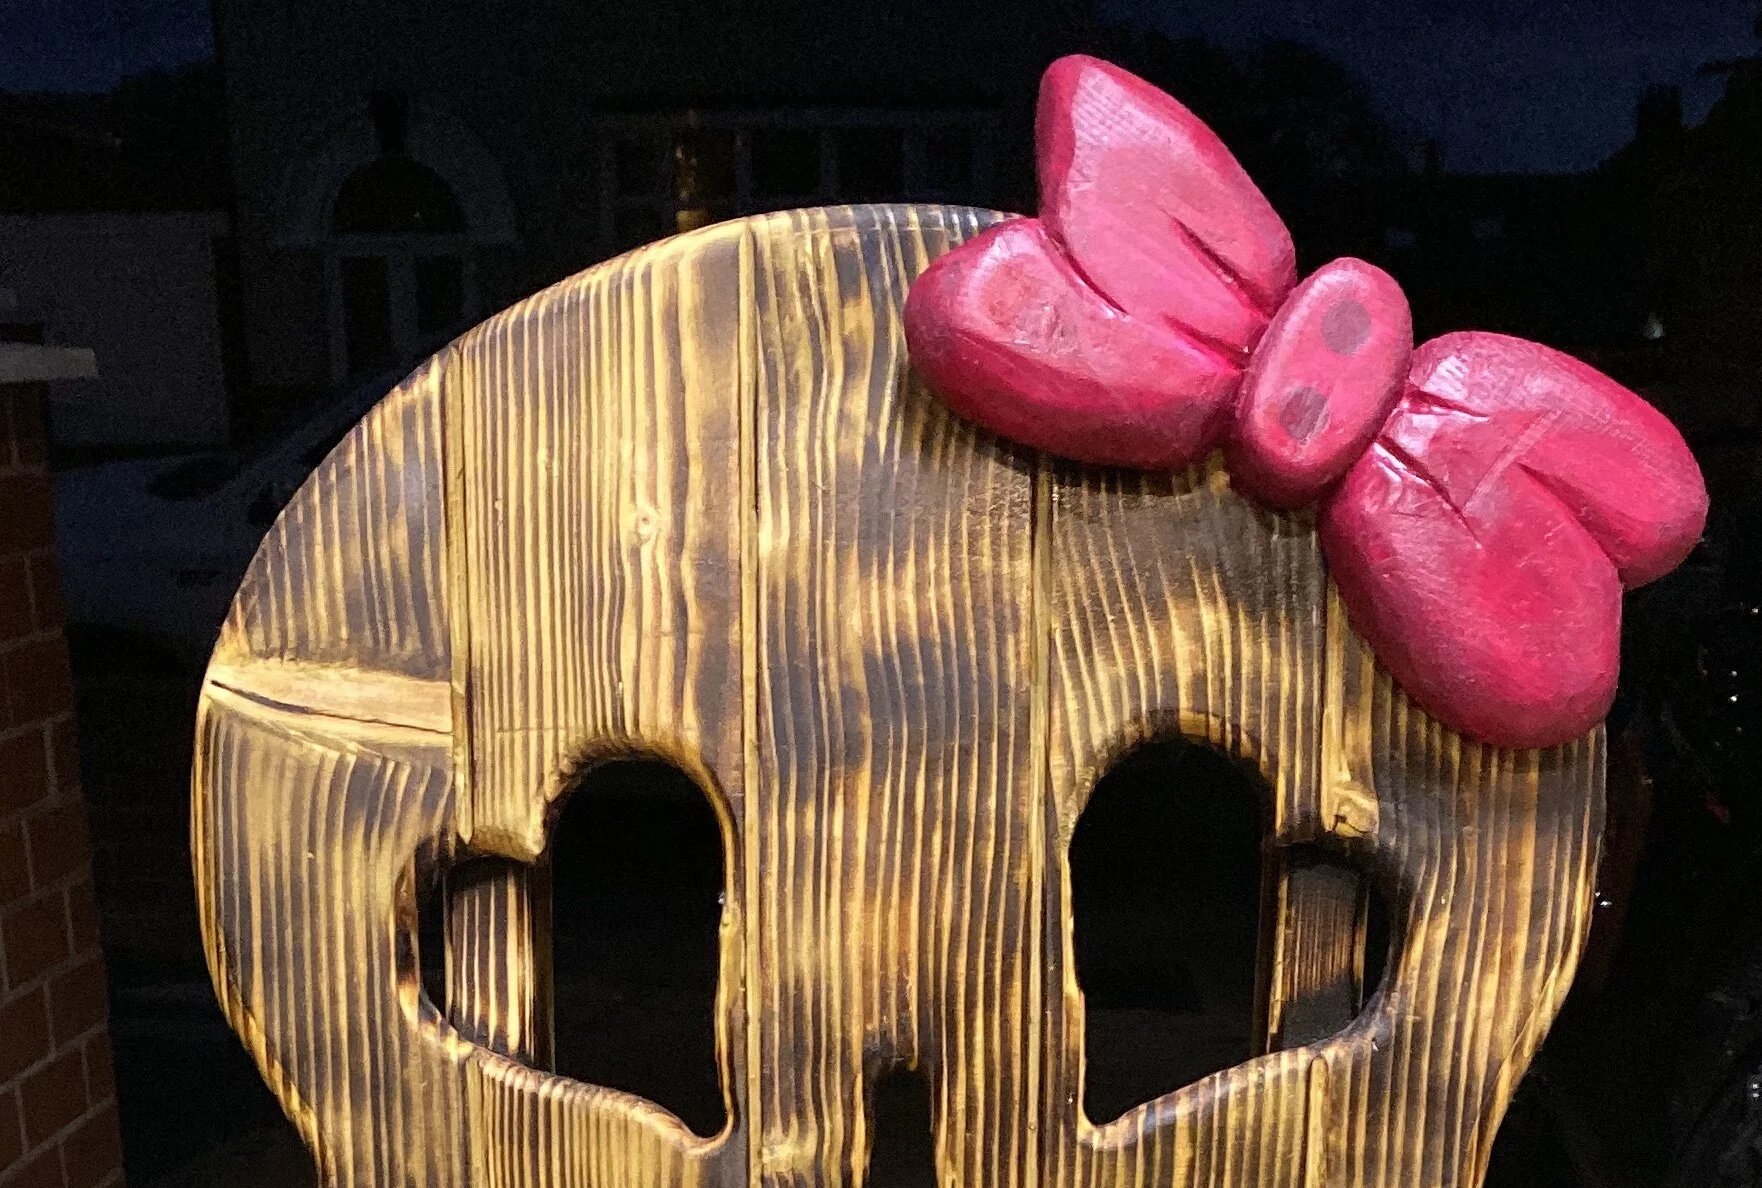
the final painted and oiled
Being that I didn’t want the chair to be completely burnt all over, I injected a bit of colour into the design with a painting the bow pink, it’s a dark pink, but pink all the same. The little girl that this was for liked the colour so it was a go to for this project. It was coloured with acrylic and driven deep into the wood, this then dried and another coat was applied, this was left to dry over a couple of days. For the wood to be protected further over the entire chair, several heavy coats of oil were sprayed and rubbed into the surfaces. In the end it lightened just to what I wanted and gave it a satin like appearance.
handing over to the new owner
Handing over items I make is both a joy and a wrench, mostly because of the time I have usually put into making something. It equates to love and effort, which you hope the person receiving it will appreciate. In this case, both the family of the little girl called Cassie, and Cassie herself were loving this chair. It was handed over on a bonfire night get together, of which there were many visitors, all of which thought the chair was great, some adults even attempted to try it on for size, attesting to the build quality of the item.
At the end of the day this was a chair for Cassie, and as can be seen from the photos, she is happy with the finished item. Hopefully to use it for a few years until she grows either out of it or bored of it. but either way it should outlast both of those.

